

ClamAV on Oracle Linux 9: Complete DIY Antivirus & Malware Protection Guide
I’m Pratik Borkar, a Technical Architecture specializing in Oracle Cloud Infrastructure (OCI) and Kubernetes. I have extensive experience designing, automating, and optimizing cloud environments using Terraform, CI/CD pipelines, and container orchestration tools. I enjoy sharing hands-on guides and real-world implementations that help engineers simplify cloud operations, improve scalability, and adopt Infrastructure as Code best practices. When I’m not automating infrastructure, I explore new DevOps tools, contribute to open-source projects, and write about cloud-native technologies.
Introduction
Malware protection on Linux servers is often overlooked, especially in enterprise environments where systems host critical applications, databases, and shared storage. While Linux is inherently secure, it is not immune to malware, ransomware, or infected files introduced through users, shared mounts, or file transfers.
ClamAV is a widely adopted open-source antivirus engine designed for Linux and Unix-based systems. This article provides a step-by-step, production-ready guide to installing and configuring ClamAV on Oracle Linux 9 (OL9) using the upstream RPM, with on-access scanning, SELinux support, automatic updates, quarantine handling, and scheduled scans.
What is ClamAV and Why Use It?
ClamAV is an open-source antivirus toolkit primarily used on Linux systems to:
Detect malware, trojans, and ransomware
Scan uploaded or shared files
Provide on-access (real-time) malware protection
Protect Linux servers that interact with Windows clients
Key Features of ClamAV
Signature-based malware detection
On-demand and on-access scanning
Automatic virus definition updates (
freshclam)Lightweight and server-friendly
SELinux-compatible
CLI-driven (ideal for automation and cron jobs)
In enterprise Linux environments, ClamAV is commonly deployed to:
Scan
/homedirectoriesProtect shared mounts
Meet compliance and security baseline requirements
Prevent malware propagation across platforms
Architecture Overview
A standard ClamAV deployment consists of:
| Component | Purpose |
| clamd | Main scanning daemon |
| clamonacc | On-access (real-time) scanner |
| freshclam | Virus database updater |
| clamscan | On-demand manual scanner |
This guide configures all components correctly for OL9 with SELinux enforcing.
Prerequisites
Before starting, verify:
Oracle Linux 9.x
SELinux in Enforcing mode
Root or sudo access
Internet connectivity for virus updates
Verify:
cat /etc/os-release
getenforce
Step 1: Download and Install ClamAV (Upstream RPM)
Oracle Linux repositories often lag behind upstream ClamAV releases. For security and stability, install the official upstream RPM.
cd /tmp
wget https://www.clamav.net/downloads/production/clamav-1.5.1.linux.x86_64.rpm
sudo dnf install -y ./clamav-1.5.1.linux.x86_64.rpm
Verify installation:
rpm -q clamav
Step 2: Create Required System Users
The upstream RPM does not create service users automatically.
ClamAV separates responsibilities using two system accounts:
clamscan→ scanning daemonclamupdate→ virus database updates
Create users:
sudo useradd -r -s /sbin/nologin -d /var/lib/clamav clamscan
sudo useradd -r -s /sbin/nologin -d /var/lib/clamav clamupdate
Verify:
id clamscan
id clamupdate
Step 3: Create Required Directories
Create directories for:
Virus databases
Runtime sockets
PID files
Logs
sudo mkdir -p \
  /usr/local/share/clamav \
  /var/log/clamav \
  /run/clamd \
  /run/clamav
Set ownership:
sudo chown -R clamupdate:clamupdate /usr/local/share/clamav /run/clamav
sudo chown -R clamscan:clamscan /run/clamd
Set permissions:
sudo chmod 755 /var/log/clamav /run/clamd
⚠️ Incorrect permissions are the most common reason ClamAV fails to start.
Step 4: Create Log Files Manually (CRITICAL)
ClamAV will not create log files automatically.
sudo touch /var/log/clamav/clamd.log
sudo touch /var/log/clamav/freshclam.log
Set ownership:
sudo chown clamscan:clamscan /var/log/clamav/clamd.log
sudo chown clamupdate:clamupdate /var/log/clamav/freshclam.log
Set permissions:
sudo chmod 640 /var/log/clamav/*.log
sudo chmod 755 /var/log/clamav
Step 5: Configure freshclam (Virus Updates)
Copy the sample configuration:
sudo cp /usr/local/etc/freshclam.conf.sample /usr/local/etc/freshclam.conf
sudo vi /usr/local/etc/freshclam.conf
Use only the following content:
DatabaseDirectory /usr/local/share/clamav
UpdateLogFile /var/log/clamav/freshclam.log
PidFile /run/clamav/freshclam.pid
DatabaseMirror database.clamav.net
Important:
Remove the Example line completely.
Set ownership:
sudo chown clamupdate:clamupdate /usr/local/etc/freshclam.conf
Step 6: Configure clamd (Scanning Daemon)
Copy sample file:
sudo cp /usr/local/etc/clamd.conf.sample /usr/local/etc/clamd.conf
sudo vi /usr/local/etc/clamd.conf
Minimal Production Configuration
DatabaseDirectory /usr/local/share/clamav

LogFile /var/log/clamav/clamd.log
LogTime yes

LocalSocket /run/clamd/clamd.sock
LocalSocketMode 666
PidFile /run/clamd/clamd.pid

User root
Foreground yes

# On-access scanning
OnAccessIncludePath /home
OnAccessExcludeRootUID yes
OnAccessPrevention yes

# Mandatory exclusions
OnAccessExcludePath ^/proc
OnAccessExcludePath ^/sys
OnAccessExcludePath ^/run
OnAccessExcludePath ^/dev
OnAccessExcludePath ^/var/lib
OnAccessExcludePath ^/var/log
OnAccessExcludePath ^/tmp

# Performance
MaxQueue 200
MaxThreads 20
OnAccessMaxThreads 10
Remove the Example line.
Set ownership:
sudo chown clamscan:clamscan /usr/local/etc/clamd.conf
Step 7: SELinux Configuration (MANDATORY)
Allow antivirus scanning in SELinux enforcing mode:
sudo restorecon -Rv /var/log/clamav /run/clamd
sudo setsebool -P antivirus_can_scan_system 1
Step 8: Download Virus Definitions (First Time)
sudo -u clamupdate /usr/local/bin/freshclam
Verify:
ls -lh /usr/local/share/clamav

total 108M
-rw-r--r--. 1 clamupdate clamupdate 8.9K Dec 17 21:18 bytecode-339.cvd.sign
-rw-r--r--. 1 clamupdate clamupdate 276K Dec 17 21:18 bytecode.cvd
-rw-r--r--. 1 clamupdate clamupdate 8.9K Dec 17 21:18 daily-27853.cvd.sign
-rw-r--r--. 1 clamupdate clamupdate  23M Dec 17 21:17 daily.cvd
-rw-r--r--. 1 clamupdate clamupdate   90 Dec 17 21:17 freshclam.dat
-rw-r--r--. 1 clamupdate clamupdate 8.9K Dec 17 21:18 main-63.cvd.sign
-rw-r--r--. 1 clamupdate clamupdate  85M Dec 17 21:18 main.cvd
You should see:
daily.cvdmain.cvdbytecode.cvd
Step 9: Create systemd Service Files
clamd.service
sudo vi /etc/systemd/system/clamd.service
[Unit]
Description=ClamAV Daemon
After=network.target

[Service]
Type=simple
User=clamscan
Group=clamscan
ExecStart=/usr/local/sbin/clamd --config-file=/usr/local/etc/clamd.conf --foreground
Restart=on-failure
RestartSec=10
RuntimeDirectory=clamd
RuntimeDirectoryMode=0755

[Install]
WantedBy=multi-user.target
Clamav-freshclam.service
sudo vi /etc/systemd/system/clamav-freshclam.service
[Unit]
Description=ClamAV Virus Database Updater
After=network.target

[Service]
Type=oneshot
User=clamupdate
Group=clamupdate
ExecStart=/usr/local/bin/freshclam

[Install]
WantedBy=multi-user.target
Clamonacc.service (On-Access Scanner)
sudo vi /etc/systemd/system/clamonacc.service
[Unit]
Description=ClamAV On-Access Scanner
After=clamd.service
Requires=clamd.service

[Service]
Type=simple
ExecStart=/usr/local/sbin/clamonacc --foreground --fdpass
Restart=always
RestartSec=5

[Install]
WantedBy=multi-user.target
Step 10: Enable and Start Services
sudo systemctl daemon-reexec
sudo systemctl daemon-reload

sudo systemctl enable clamd clamav-freshclam clamonacc
sudo systemctl start clamd
sudo systemctl start clamav-freshclam
sudo systemctl start clamonacc
Step 11: Verify Services
systemctl is-active clamd
systemctl is-active clamonacc
systemctl status clamav-freshclam
Expected:
clamd→ activeclamonacc→ activefreshclam→ inactive (0/SUCCESS)
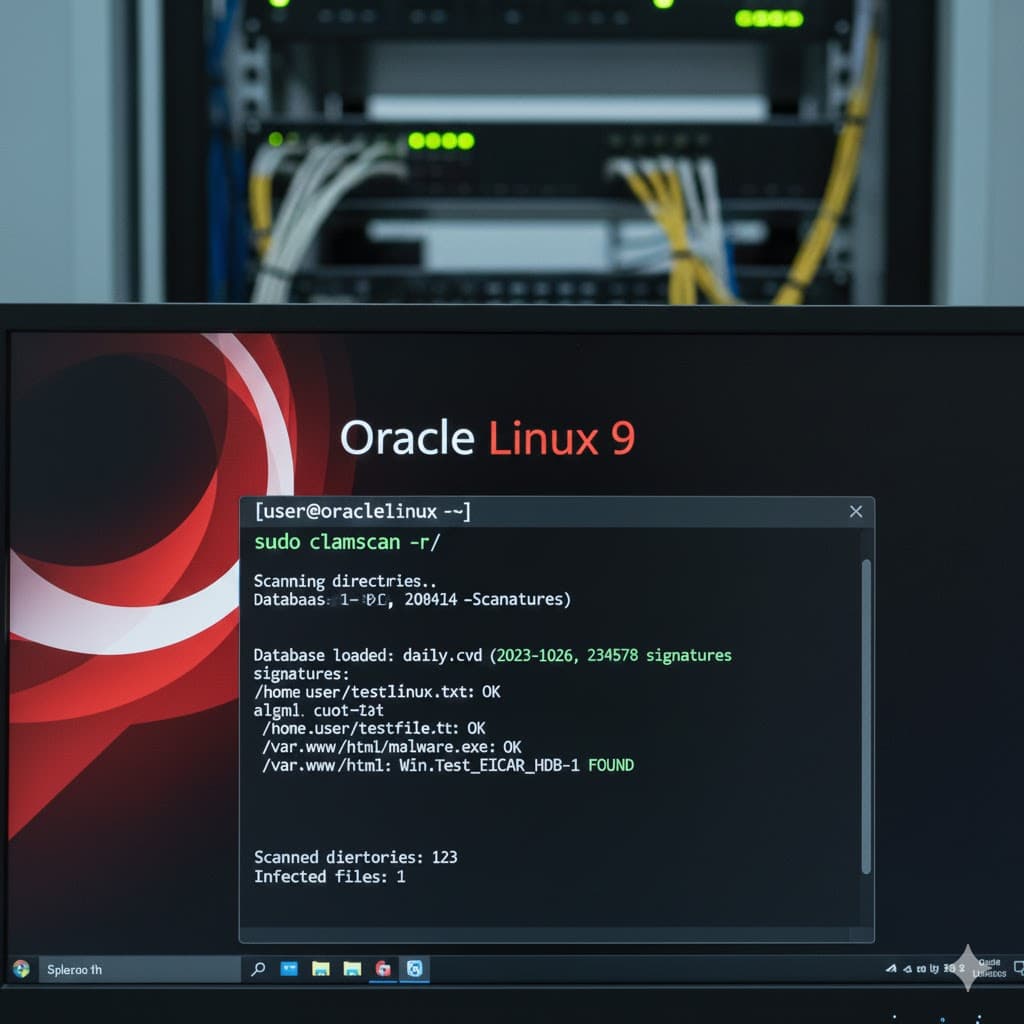
Step 12: Malware Validation (EICAR Test)
[opc@#### ~]$ wget https://secure.eicar.org/eicar_com.zip
--2025-12-17 22:27:37--  https://secure.eicar.org/eicar_com.zip
Resolving secure.eicar.org (secure.eicar.org)... 89.238.73.97, 2a00:1828:1000:2497::2
Connecting to secure.eicar.org (secure.eicar.org)|89.238.73.97|:443... connected.
HTTP request sent, awaiting response... 200 OK
Length: 184 [application/zip]
Saving to: ‘eicar_com.zip’

eicar_com.zip                    100%[=========================================================>]     184  --.-KB/s    in 0s

2025-12-17 22:27:38 (3.26 MB/s) - ‘eicar_com.zip’ saved [184/184]

[opc@#### ~]$ unzip eicar_com.zip
error:  cannot open zipfile [ eicar_com.zip ]
        Operation not permitted
unzip:  cannot find or open eicar_com.zip, eicar_com.zip.zip or eicar_com.zip.ZIP.
[opc@OHS ~]$
Expected behavior:
Root can read the file (expected)
Non-root users are blocked
Detection logged in
clamd.log
Check logs:
[opc@#### ~]$ journalctl -u clamonacc | tail
Dec 17 22:04:10 OHS clamonacc[4297]: ERROR: ClamClient: Could not connect to clamd, Could not connect to server
Dec 17 22:04:10 OHS clamonacc[4297]: ERROR: Clamonacc: daemon is local, but a connection could not be established
Dec 17 22:04:10 OHS systemd[1]: clamonacc.service: Main process exited, code=exited, status=2/INVALIDARGUMENT
Dec 17 22:04:10 OHS systemd[1]: clamonacc.service: Failed with result 'exit-code'.
Dec 17 22:04:15 OHS systemd[1]: clamonacc.service: Scheduled restart job, restart counter is at 3.
Dec 17 22:04:15 OHS systemd[1]: Stopped ClamAV On-Access Scanner.
Dec 17 22:04:15 OHS systemd[1]: Started ClamAV On-Access Scanner.
Dec 17 22:04:16 OHS clamonacc[4726]: ClamInotif: watching '/home' (and all sub-directories)
Dec 17 22:05:44 OHS clamonacc[4726]: /home/opc/eicar_com.zip: Eicar-Test-Signature FOUND
Dec 17 22:27:45 OHS clamonacc[4726]: /home/opc/eicar_com.zip: Eicar-Test-Signature FOUND


[opc@#### ~]$ sudo tail -f /var/log/clamav/clamd.log
Wed Dec 17 22:04:11 2025 -> SWF support enabled.
Wed Dec 17 22:04:11 2025 -> HTML support enabled.
Wed Dec 17 22:04:11 2025 -> XMLDOCS support enabled.
Wed Dec 17 22:04:11 2025 -> HWP3 support enabled.
Wed Dec 17 22:04:11 2025 -> OneNote support enabled.
Wed Dec 17 22:04:11 2025 -> Self checking every 600 seconds.
Wed Dec 17 22:05:44 2025 -> /home/opc/eicar_com.zip: Eicar-Test-Signature FOUND
Wed Dec 17 22:15:44 2025 -> SelfCheck: Database status OK.
Wed Dec 17 22:25:44 2025 -> SelfCheck: Database status OK.
Wed Dec 17 22:27:45 2025 -> /home/opc/eicar_com.zip: Eicar-Test-Signature FOUND
Step 13: Quarantine and Scheduled Scans
Create quarantine directory:
sudo mkdir -p /var/quarantine/clamav
sudo chmod 700 /var/quarantine/clamav
Daily scan example:
/usr/local/bin/clamscan -r --infected \
  --move=/var/quarantine/clamav \
  --log=/var/log/clamav/daily_scan.log \
  /home /Data
Conclusion
This DIY ClamAV setup provides enterprise-grade malware protection on Oracle Linux 9, including:
Real-time scanning
SELinux enforcement
Automated updates
Safe quarantine handling
When deployed correctly, ClamAV becomes a silent, reliable security layer that protects Linux servers without impacting performance.